Developer documentation
Installation
At the moment, the only supported way to install AnatQC is within a container.
downloading a container
There are prebuilt versions of AnatQC on Docker Hub. You can pull the latest version by running
docker pull neuroinformatics/anatqc
or you can pull a specific version e.g., 0.4.0 by running
docker pull neuroinformatics/anatqc:0.4.0
building a container
To build AnatQC as a container, grab the latest Dockerfile from the repository and run
docker build -t anatqc:latest - < Dockerfile
Now you can run anatQC.py using docker run
docker run anatqc:latest --help
XNAT Installation
The following section will describe how to build and configure AnatQC as a XNAT plugin.
building the plugin
Clone the xnat-1.7.6 branch from the github.com/harvard-nrg/anatqc
repository
git clone -b xnat-1.7.6 --single-branch https://github.com/harvard-nrg/anatqc
Change into the repository directory and compile the plugin using Gradle
./gradlew jar
Once the plugin has been compiled, move the resulting .jar into your XNAT plugins directory
mv ./build/libs/anatqc-plugin-1.0.0.jar ${XNAT_HOME}/plugins/
setting up the container
Note
This documentation assumes you have successfully built the container and that the container is being served from a local Docker daemon e.g., unix:///var/run/docker.sock on your XNAT server.
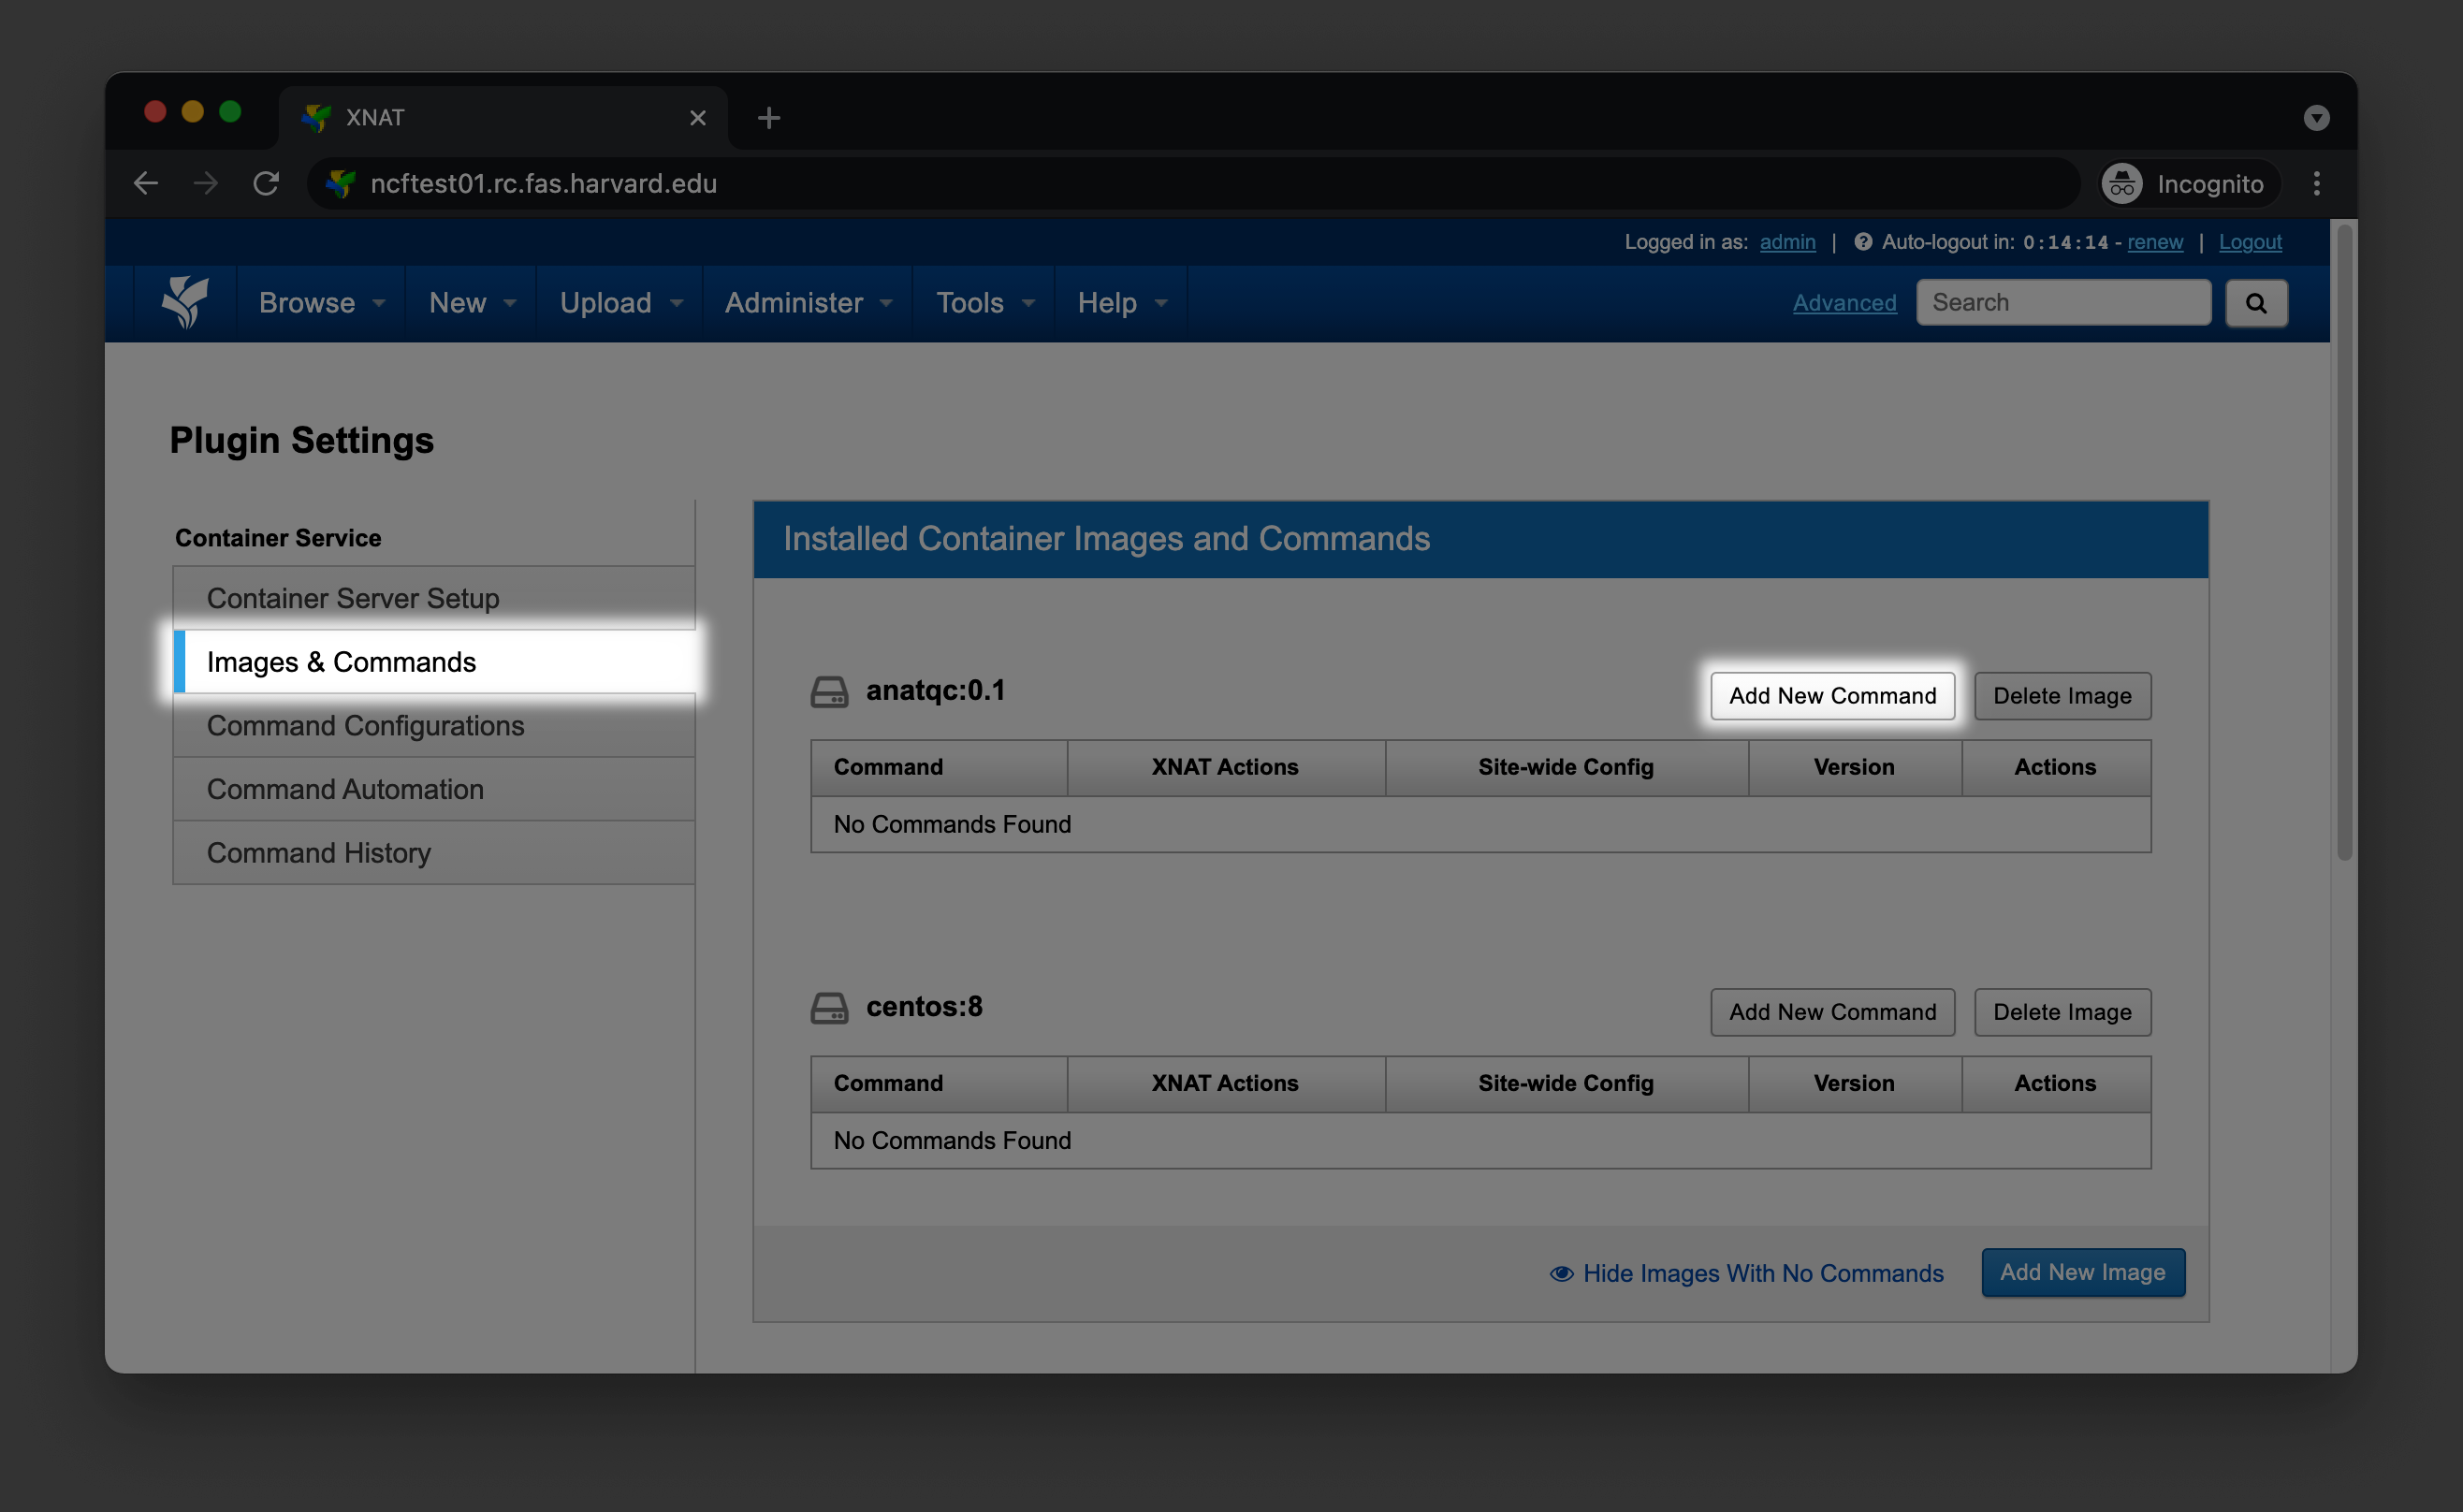
To setup the container within XNAT, go to Administer > Plugin Settings > Images & Commands, find the AnatQC container, and click Add New Command
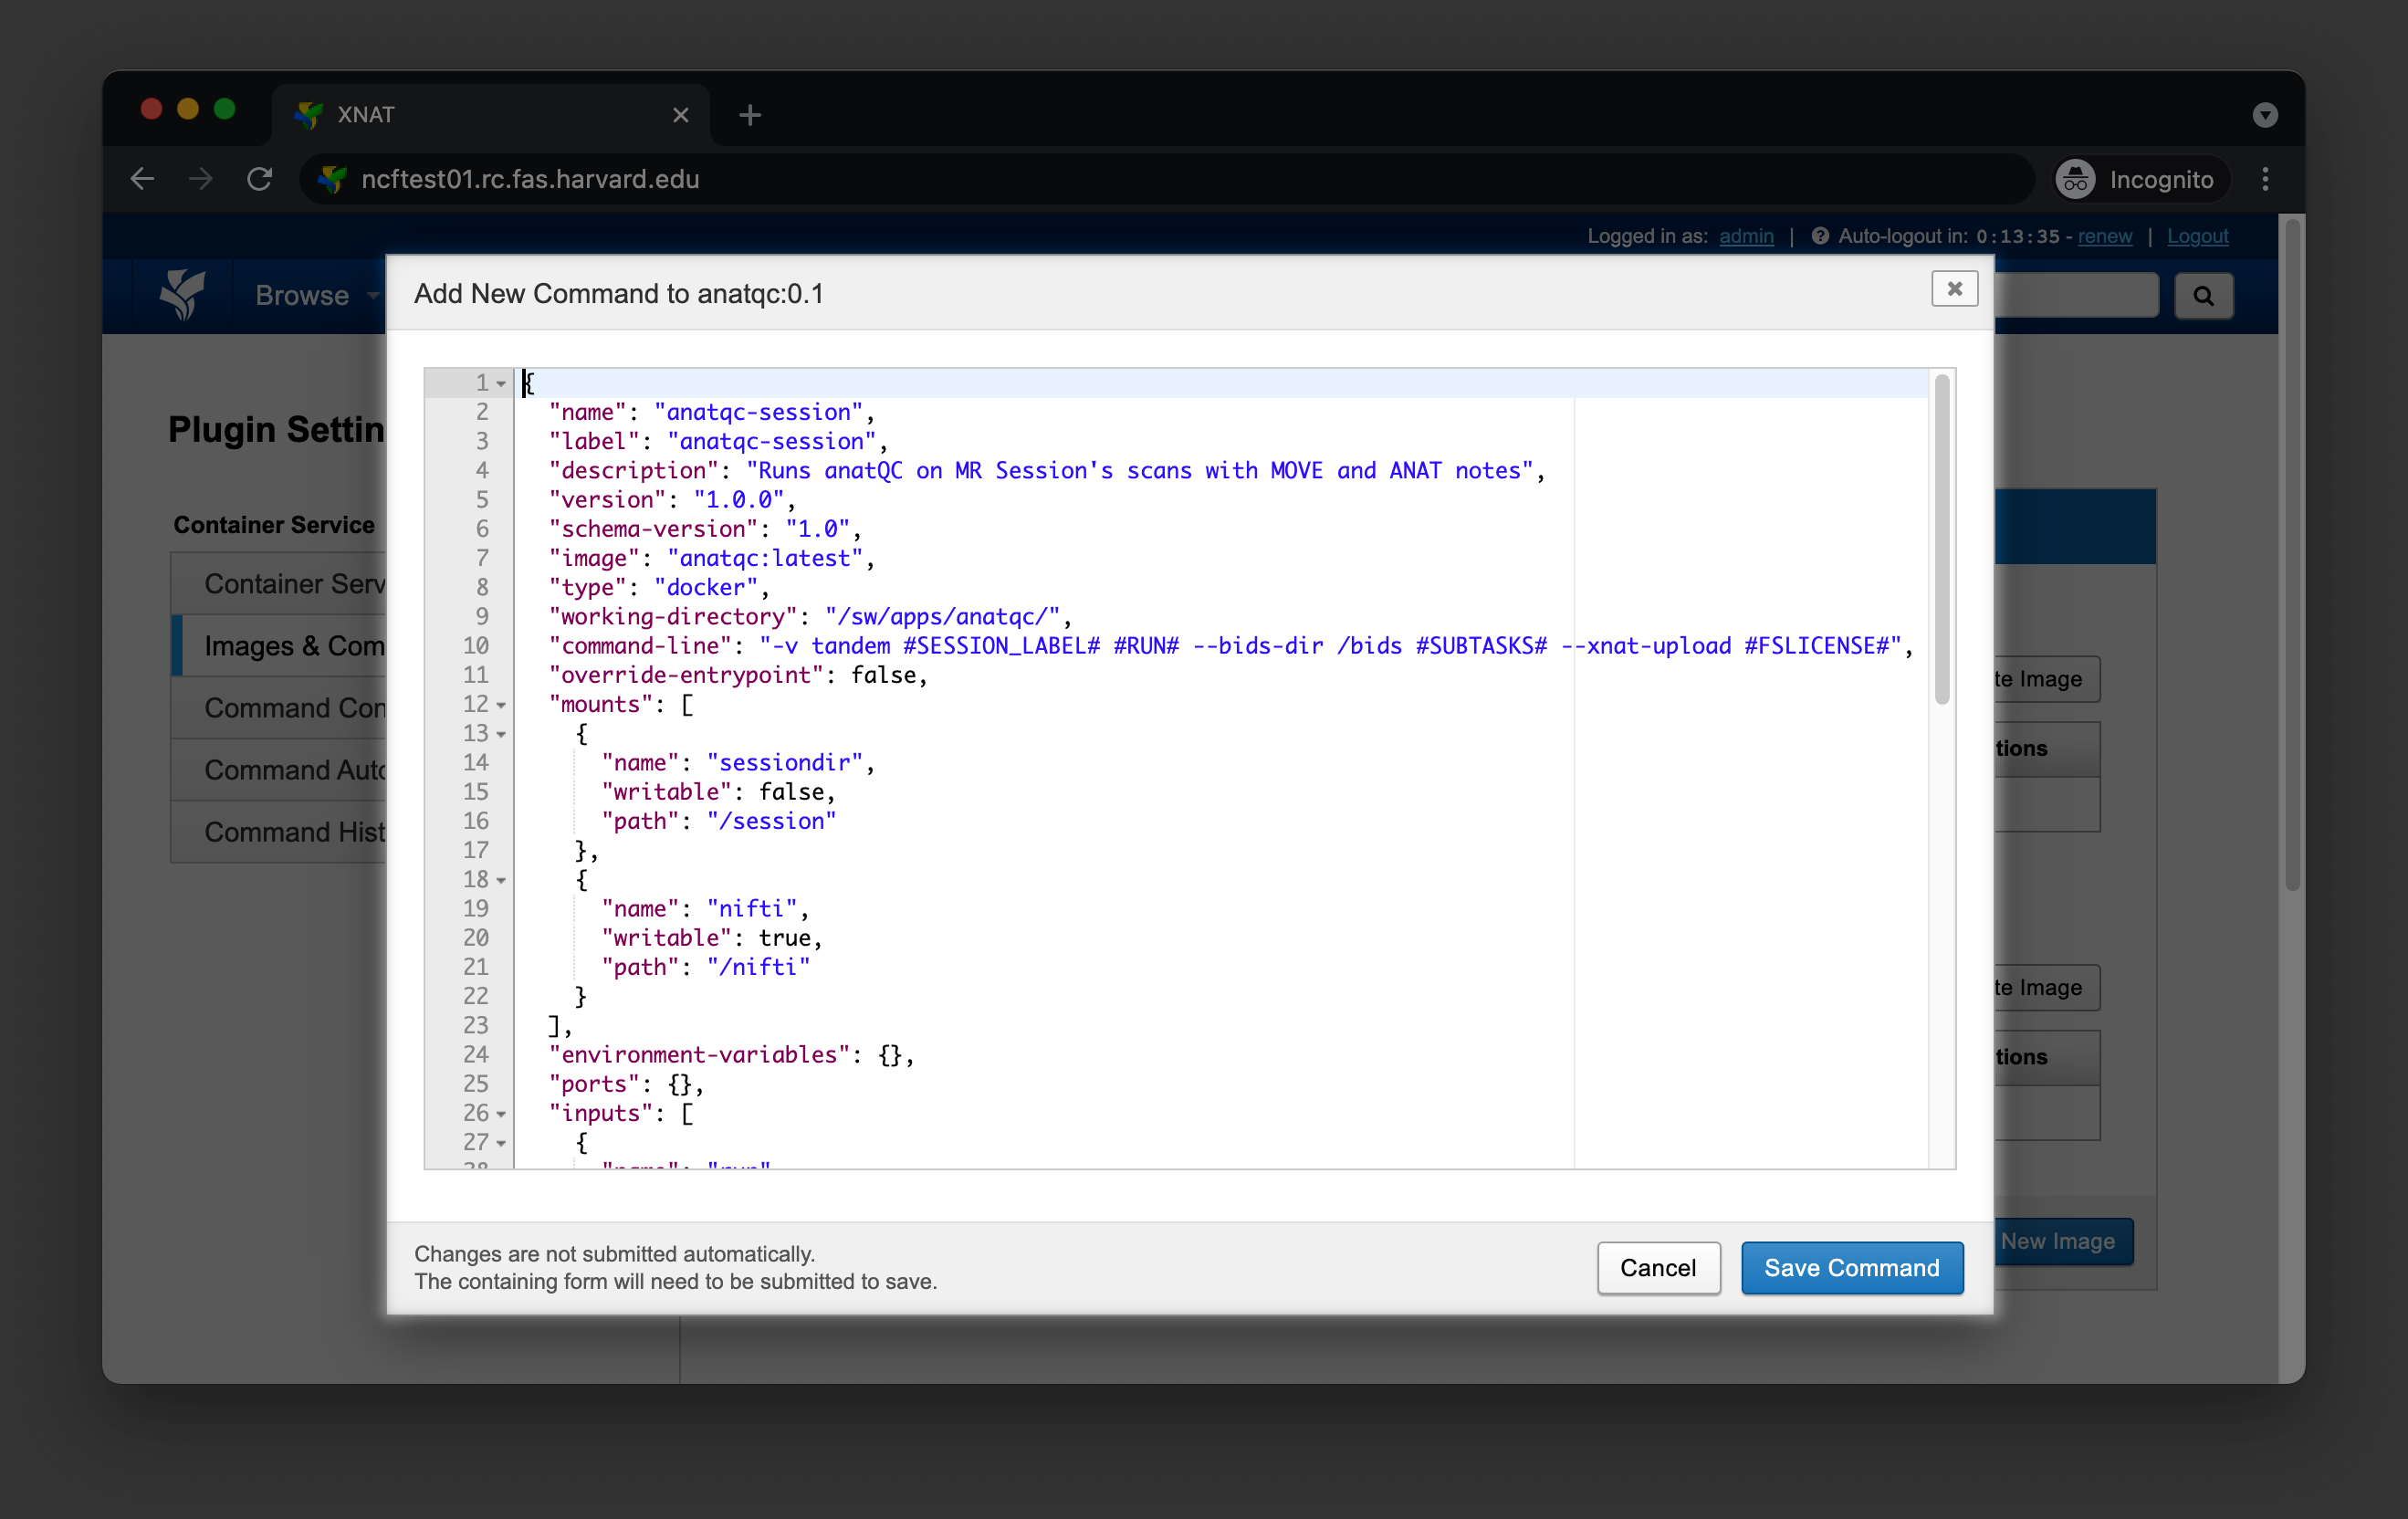
You should see a small dialog box where you can configure your command. Paste the content from command.json.
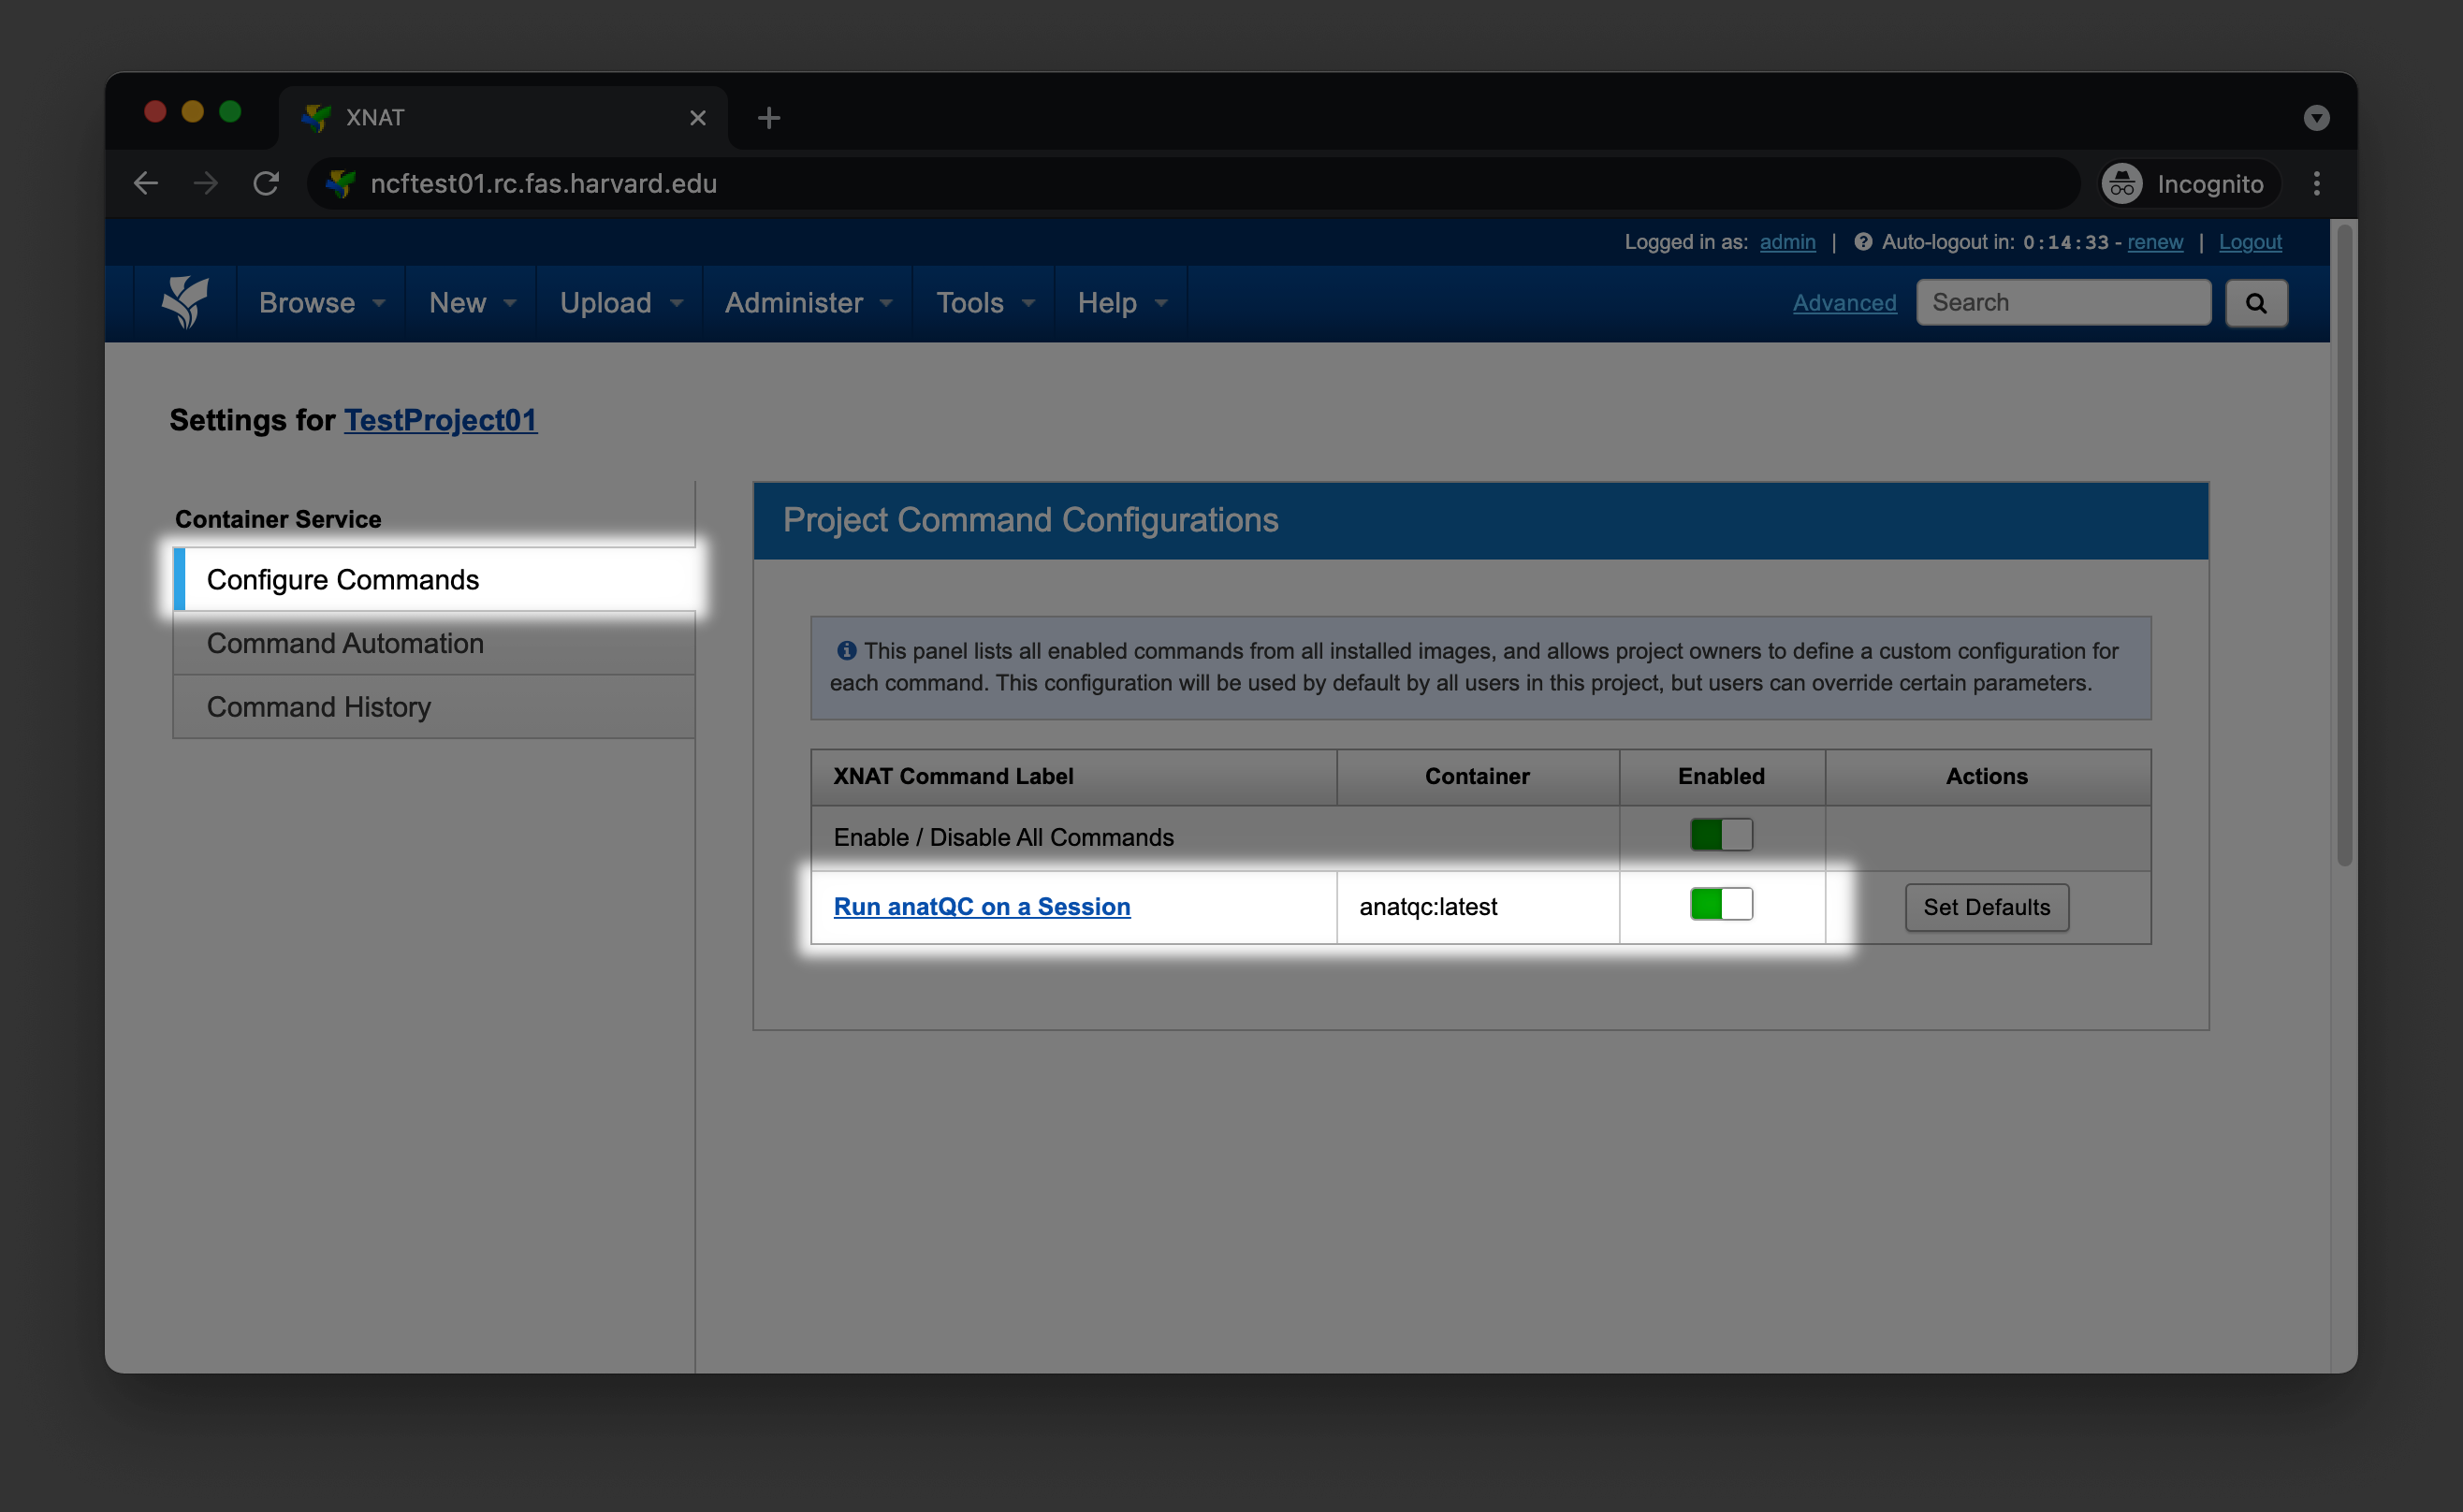
Navigate to your Project’s home page and click on Project Settings in the Actions box. Select Configure Commands and enable the new command for your project